Controls

Status bar
The status bar at the top of the display shows status information, including:
- Access Point Status Indicator
AP - Access Point
- Status display of active bus systems and components
N2K - NMEA2000
183 - NMEA0183
USB - NMEA0183 via USB
TCP - NMEA0183 via TCP (WiFi)
GPS - GPS sensor of the OBP60 (position found)
Page number displayed in the middle of the status bar. Also serves as a status indicator (pulsating page number).
Date and time (country-specific)
Display of time zone
UTC - Universal Time
LOT - Local Time
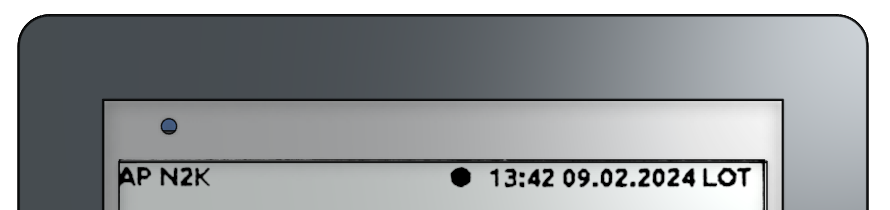
The status bar is visible on all display pages; it shows the current status of the device.
Note
The content displayed on an e-paper display is retained when the device is switched off. The pulsing number in the status bar indicates that the device is active. If it is not flashing, the software is inactive or the device has been switched off.
Display area
The display area is located in the center of the screen. All relevant information is shown there. The content of the display area is updated each time the user switches to a new page.
The display area is updated every second as a partial image refresh.
Due to the e-paper technology, ghost images from previous display states may appear on the screen after some time. To remove these ghost images, a full refresh of the display is performed every 10 minutes. During this process, the entire image content is inverted several times, then cleared, and subsequently rewritten. A full refresh is indicated by a brief flicker of the display. The same process occurs 4 seconds after a page change. This allows for quick access to multiple pages in succession. Only after 4 seconds is a full refresh performed on the most recently viewed page, thus removing ghost images from older pages. The regular full refresh is enabled by default and can be disabled in the configuration settings if needed.
The appearance of ghost images depends on the OBP60’s display temperature. At lower temperatures, ghost images are more noticeable, and the display responds more slowly than at higher temperatures. For the first five minutes after powering on, a full refresh is performed every minute to allow the display to acclimatize. The plexiglass cover protects against excessive UV radiation from the sun, and an IR filter prevents overheating.
Note
Despite the filter, extremely bright sunlight can cause the display to lose contrast. Black areas will then appear gray. The display is not defective in this case. After a full refresh, the display will regenerate and the contrast will be fully restored.
Important
When the OBP60 is not in use, please clear the screen and cover the device with the protective cap. This will protect it from excessive sunlight and weather conditions.
Footer
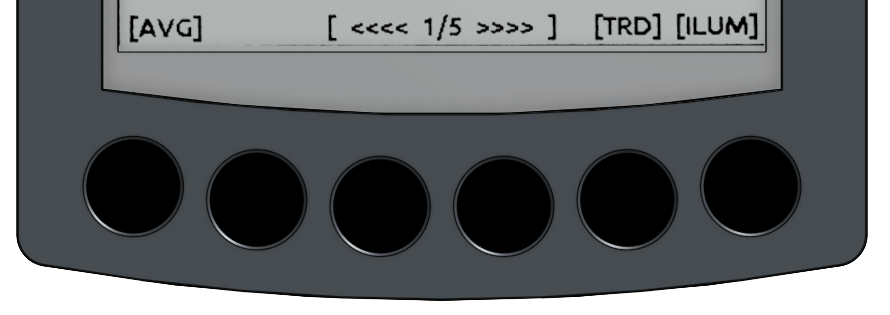
The footer is used to label the keyboard functions.
The two middle buttons and the right button have fixed functions that are the same on all sides:
Middle buttons: Page turn. The left button goes back one page, the right button forward one page. The pages are processed sequentially: once the maximum number of pages has been reached, the program returns to page 1.
Right button: Backlight on/off
Page changes can also be made using swipe gestures.
The current page and page number are displayed in the information area.
The function of the remaining keys changes depending on the content of the display page. Active keys are labeled with abbreviations in square brackets, such as [AVG]. There may also be display pages that do not contain any additional key functions.
Sensor buttons
The OBP60 has six capacitive touch buttons along the bottom edge of the display. The buttons respond to touch by changing the reference potential. Water droplets or rain have virtually no effect on the buttons’ activation. The following button functions are currently implemented:
Key sensitivity configuration
Swipe left / right
Quick tap
Normal pressure
Pressing multiple keys simultaneously
Lock keys
Key sensitivity can be adjusted via the configuration page. This allows you to set the threshold at which a key press is detected. The keys have a recess in the center, making it easier to locate the center by touch. Detected key presses are signaled audibly with a beep.
The buttons are flush with the display. This allows you to switch between page content using swipe gestures. To do this, quickly swipe right or left across at least two buttons. The software automatically detects when multiple buttons are pressed in succession and determines the swipe direction accordingly. Audible feedback is provided for each swipe gesture. A right swipe is signaled by a low-high tone sequence, and a left swipe by a high-low tone sequence. Page navigation is rolling at the ends.
A short tap does not produce a beep. A short tap of the two outermost buttons on the left and right in succession activates the keypad lock, followed by a long beep. After this, normal button functions are disabled and swipe gestures are no longer recognized. The message [Keylock active] is displayed. The order in which the buttons are pressed to activate the keypad lock is irrelevant. Deactivating the keypad lock is done in the same way.
Important
If your OBP60 is positioned in a way that allows someone to accidentally lean against it, lower the key sensitivity accordingly. This will prevent accidental key presses. You can also activate the key lock function as an additional safeguard against unintentional operation.
Flash LED
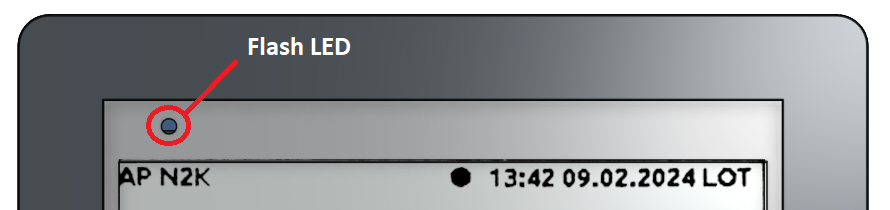
A small flashing LED is located to the upper left of the display. This LED indicates the operating status of the OPB60. The LED can display different colors. It illuminates at maximum brightness, ensuring it is easily visible even in bright sunlight.
Red - Alarm when limit value is exceeded
Green - Confirmation of status changes (e.g., autopilot on/off)
Blue - Signaling of states (e.g. GPS reception, data transfer, etc.)
Backlight
To make the display readable at night, a backlight can be activated using the right sensor button. The color and brightness can be adjusted via the settings. The backlight can generally be configured as follows:
Permanently attached
Permanently out
Manually switchable via sensor button
Automatically switchable depending on the position of the sun
Important
If you want to use the sun’s position to control the backlight, you need a valid GPS signal to trigger the switching states. The backlight will then automatically switch on at astronomical sunset and off at sunrise, taking your geographical location into account. If no valid GPS signal is available, the switching states will not change.
Buzzer
The buzzer serves as an audible signal for malfunctions and as feedback for status changes. The buzzer is located inside the device. Its function and volume can be configured. A short beep sounds when the OBP60 is switched on and during a manual or automatic reset to indicate that the device is booting up.
Reset-Taster
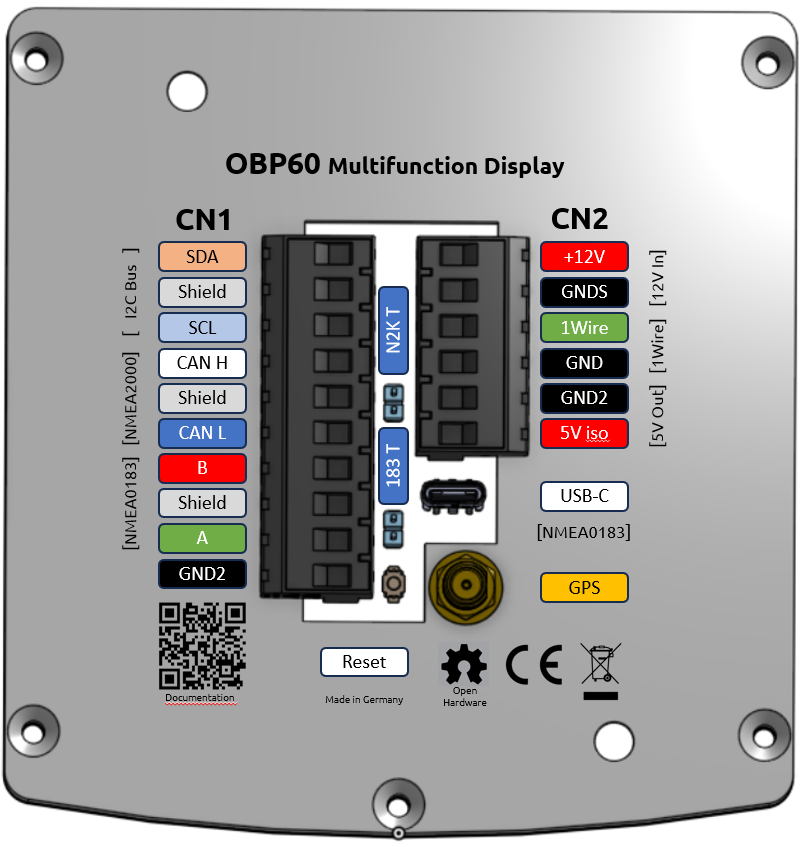
The reset button is located on the back of the display, on the underside of the large left connector CN1. The reset button is not used during normal operation. However, it can be useful to perform a manual reset during programming procedures. To trigger the reset, use a non-conductive, narrow object and gently press the button until you feel a click.
Warning
Do not use conductive objects. These can cause short circuits on the circuit board and damage the device.