Example configuration
OBP60 Yachta AvNav
The following example demonstrates how to establish data transmission to the Yachta wind sensor and an NMEA2000 network using an OBP60, and how to use the data in the AvNav navigation app on a tablet. The OBP60 serves as a central data repository where all data converges. Data transmission occurs via Wi-Fi network connections provided by an LTE router. The advantage of an LTE router is that it can provide all devices on board with a Wi-Fi internet connection, allowing devices within the Wi-Fi network to communicate with each other. The LTE router isolates the Wi-Fi network from the internet, preventing external access to your internal network. This allows devices such as mobile phones, tablets, and laptops on board to connect to the internet, and all devices have access to the sensor data via a web browser. The AvNav navigation software is installed on an Android tablet and used for navigation.
Tip
In principle, the OBP60’s access point could also be used as a central Wi-Fi router. However, its performance is significantly lower than that of an LTE router. We strongly recommend using a dedicated LTE or Wi-Fi router. This will prevent communication problems between devices.

Fig.: Example configuration OBP60, Yachta, AvNav
The configuration process consists of the following steps:
Setting up an LTE router
Connecting OBP60 to NMEA2000 network and Yachta wind sensor
Connecting AvNav to the OBP60
Setting up an LTE router
You can use either mobile or stationary devices as LTE routers. Mobile devices have the advantage of operating independently on a battery for extended periods and can also be used on land during excursions. Stationary devices are suitable when maximum reception is required, especially when traveling near the coast and needing to bridge long distances to the nearest mobile network base station. In such cases, it’s advisable to install mobile antennas at the top of the mast and connect them to the stationary router via cable.
Tip
When buying an LTE router, make sure it can operate in dual-band mode on both the 2.4 GHz and 5 GHz Wi-Fi frequency bands simultaneously and supports the 4G/5G mobile network standard. This way, you benefit from a high-performance internet and Wi-Fi connection in the 5 GHz band and avoid the often congested 2.4 GHz frequency bands. Such routers can seamlessly exchange data between the two frequency bands. An old mobile phone in hotspot mode performs similarly to an LTE router and can be a cost-effective alternative.
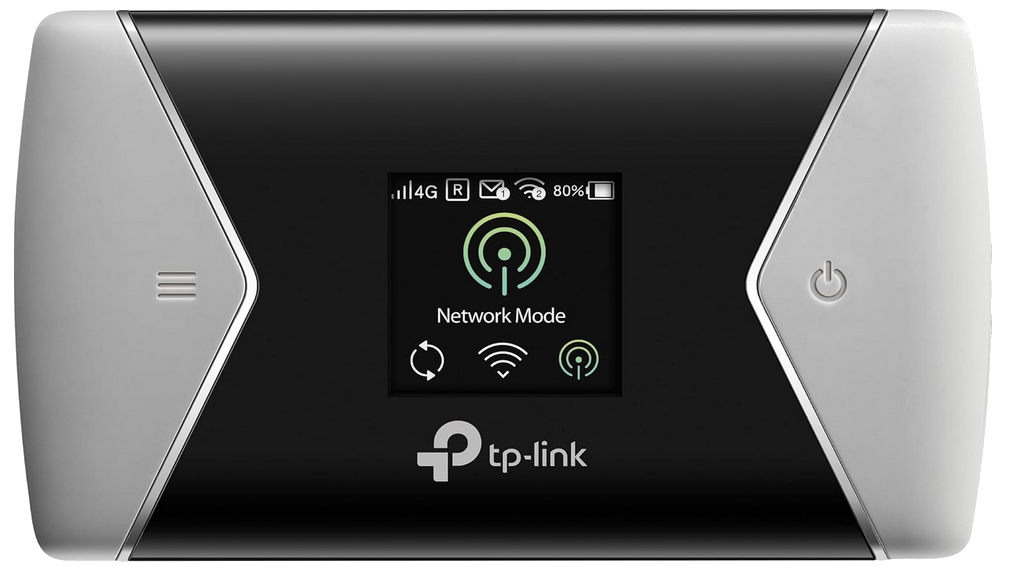
Abb.: Mobiler 4G-LTE-Dualband-Router TP-Link M7450
- Performance data
4G/LTE mobile communication standard 50 Mbps
WiFi Dualband 2.4 GHz oder 5 GHz 300 MBit/s 1
3000 MAh LiPo-Battery
15 Hours of stand-alone runtime
Up to 32 WiFi devices can be connected.
32 GB SD card storage
USB, SMB and FTP share for movies and music from SD card
- 1
Simultaneous dual operation is not possible
Warning
The TP-Link M7450 LTE router cannot operate on both frequency bands simultaneously. Therefore, you must permanently set the TP-Link M7450 to the 2.4 GHz frequency band. The OBP60 only operates in the 2.4 GHz range.
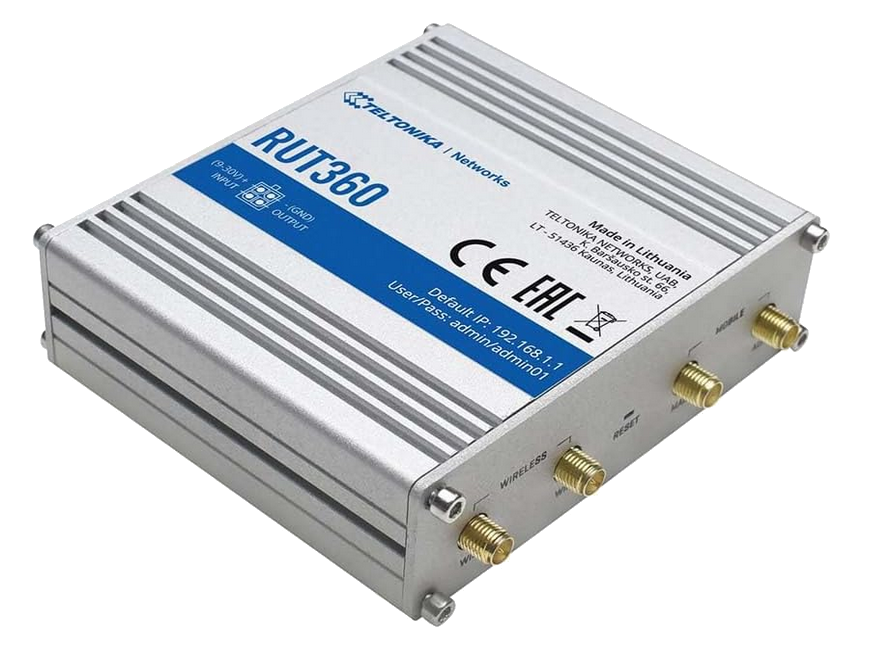
Fig.: Stationary 4G LTE dual-band router RTU360
- Performance data
4G/LTE mobile communication standard 50 Mbps/scale
WiFi Dual Band 2.4 GHz and 5 GHz 300 Mbps
2X CAT6 LAN 100 MBit/s
External antennas for LTE and WiFi
12V power supply input
230V AC power supply
The LTE router is set up according to the user manual. You will need a mobile data plan for an internet connection. Most mobile providers offer affordable data plans. Data plans with a fixed data allowance for a specified period are recommended. Choose a plan that matches your data usage. You can use this data allowance without restrictions in all EU countries, just as you would in your home country.
For this configuration example, it is assumed that the devices are assigned the following IP addresses by the router:
MyBoat - WiFi-SSID
MySecret - WiFi Password
192.168.1.1 - LTE-Router
192.168.1.101 - OBP60
192.168.1.102 - Windsensor Yachta
192.168.1.103 - Android tablet with AvNav
Hint
In your specific case, the IP addresses may differ. If so, use the IP addresses assigned to the devices by the router.
Data transmission
The following diagram shows the data transfer and which devices are servers or clients during data transfer.
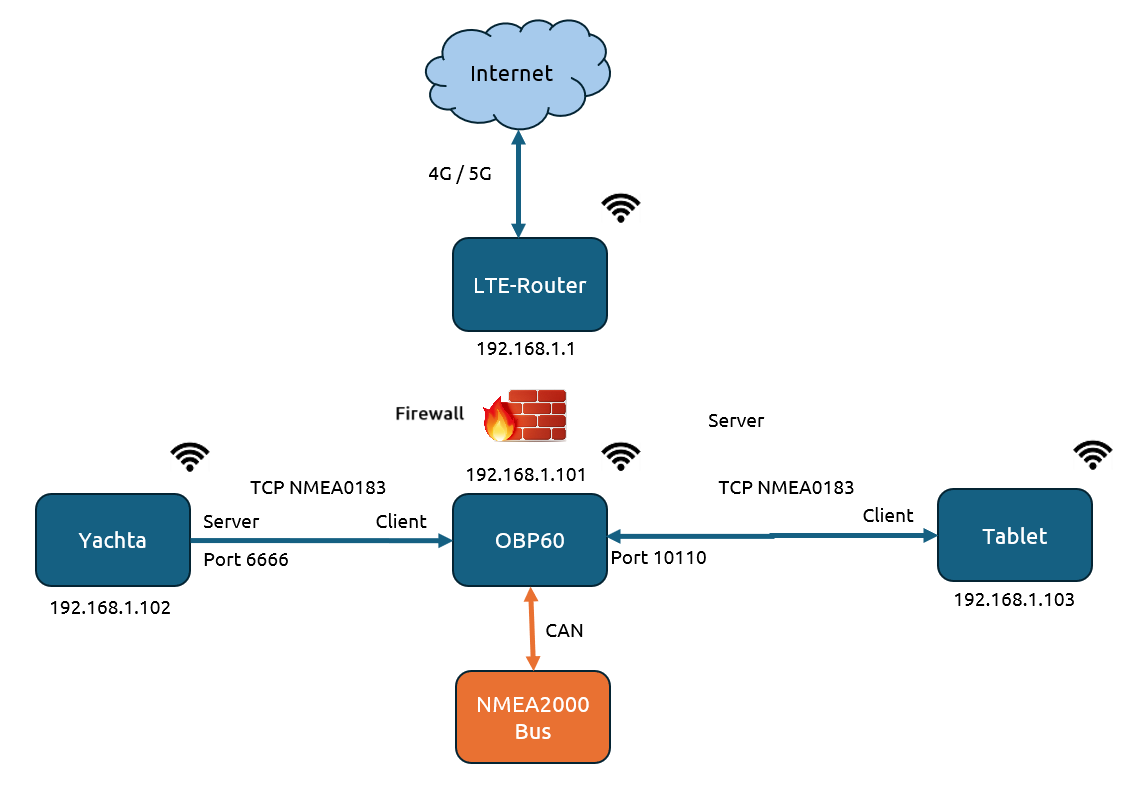
Fig.: Schematic of data transmission
OBP60 configuration

The OBP60 connects to the LTE router’s Wi-Fi network. The TCP server is configured to transfer data to the tablet. The TCP client connection is used to communicate with the Yachta wind sensor. The OBP60 is connected to the boat’s NMEA2000 network via cable. Sensor data stored in the OBP60, such as wind sensor data, is also transmitted to the NMEA2000 bus.
Make the following adjustments:
Attitude |
OBP60 |
|---|---|
System Name |
OBP60V2 |
WiFi Client |
On |
WiFi Client SSID |
MyBoat |
WiFi Client Password |
MySecret |
:Ref:`Config - Converter |
|
NMEA2000 Out |
On |
TCP Port |
10110 |
NMEA0183 Out |
On |
NMEA0183 In |
On |
To NMEA2000 |
On |
SeaSmart Out |
On |
Enable |
On |
Remote Port |
6666 |
Remote Address |
192.168.1.102 |
NMEA0183 Out |
Off |
To NMEA2000 |
On |
SeaSmart Out |
Off |
After configuration, you should see the following information in the status. The OBP60 is registered as a Wi-Fi client with the LTE router and has been assigned the IP address 192.168.1.101. The OBP60 is connected to the Yachta wind sensor as a TCP client. Wind data is received as NMEA0183 telegrams via this connection. The number of devices connected to the OBP60 as TCP clients is displayed under “Clients.” If a tablet is connected to the OBP60, one device should be displayed. The NMEA2000 status is shown as “Online” when data is being exchanged via the NMEA2000 bus. The number of exchanged NMEA2000 telegrams is shown under “NMEA2000 In/Out.” If a tablet is connected to the OBP60 via TCP, the number of exchanged NMEA0183 telegrams is shown under “TCP In/Out.”
Status messages |
OBP60 |
|---|---|
WiFi Client Connected |
True |
WiFi Client IP |
192.168.1.101 |
#Clients |
2 |
NMEA2000 State |
[0] Online |
NMEA2000 In |
Number of telegrams |
NMEA2000 Out |
Number of telegrams |
TCP In |
Number of telegrams |
TCP Out |
Number of telegrams |
The OBP60 is connected to the NMEA2000 network as shown in the following image. If the OBP60 is a normal participant in the bus system, termination must be deactivated.
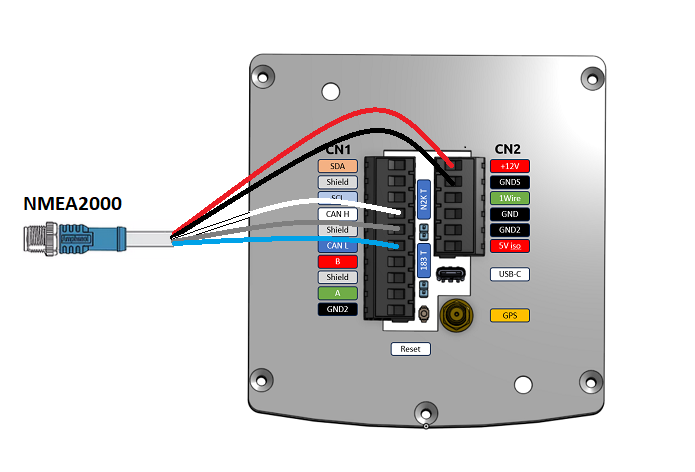
Fig. CAN bus connection OBP60
Yachta configuration
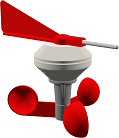
The Yachta wind sensor is configured to connect to the LTE router’s Wi-Fi network. The wind sensor provides wind data to the OBP60 via port 6666. Only data from the Yachta wind sensor is transmitted to the OBP60.
The following settings are configured for the Yachta wind sensor:
Attitude |
Yacht |
|---|---|
Network Settings |
|
WLAN Client SSID |
MyBoat |
WLAN Client IP |
MySecret |
Connection Timeout |
30S |
WLAN Sever SSID |
Yacht |
WLAN Server Password |
Xxxxxxxxx |
AP Channel |
1 |
Server Mode |
HTTP (JSON/NMEA) |
MDNS Service |
On |
Device Settings |
|
Wind Sensor Type |
Yacht 2.0 |
Tip
The Yachta wind sensor can be put into demo mode. This allows its functionality to be tested outside the boat. The wind sensor then provides simulated wind data. The simulation mode can be activated via Server Mode using the setting Demo Mode.
After configuration, the following status messages should be visible under Device Info in the Yachta wind sensor:
Status messages |
Yacht |
|---|---|
Network Parameter |
|
WLAN Client SSID |
MyBoat |
WLAN Client IP |
192.168.1.102 |
Connection Quality |
>50% |
Tablet configuration

The Android tablet is added to the LTE router’s Wi-Fi network, and then the AvNav app is installed from the Play Store. Refer to the tablet’s manual for configuration details. Data from the tablet’s GPS receiver can also be used in the NMEA0183 and NMEA2000 networks.
Attitude |
Android-Tablett |
|---|---|
WiFi Settings |
|
WiFi |
On |
WiFi Client SSID |
MyBoat |
WiFi Client Password |
MySecret |
App-Installation |
AvNav |
The following describes how to use bus data via a tablet in AvNav. Data transmission occurs via Wi-Fi. The tablet exchanges data with the OBP60 via a TCP connection. The tablet is connected to the OBP60 as a TCP client. In AvNav, the connection is configured as a TCP reader.

Image: AvNav homepage for Android
Under AvNav, click the icon with the 3 lines in the top right corner of the homepage.

You will then be taken to the server status page. There, you can establish additional connections to the AvNavServer using the plus symbol.

For bidirectional communication via USB, select TCPReader.

Fig.: Connection types
Enter the IP address of the OBP60 under IP Address and 10110 as Port. To be able to not only send but also receive data, activate SendOut.
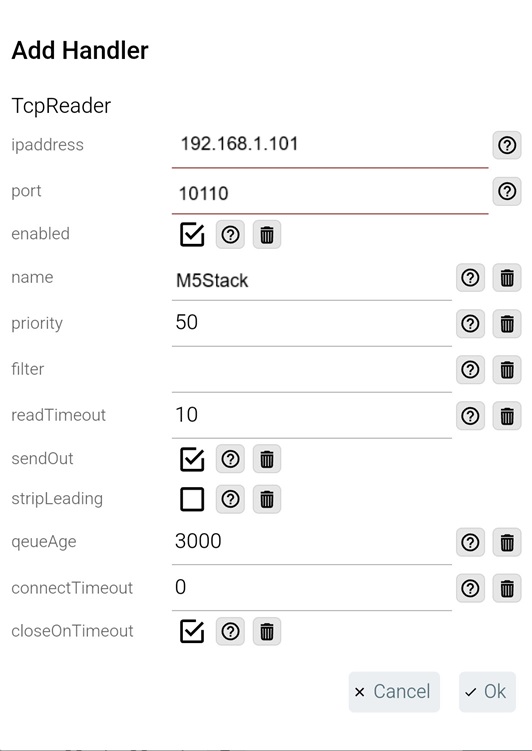
Fig.: TCPReader connection settings
After all data has been transferred, the new connection can be seen in the server status as a TCPReader connection.
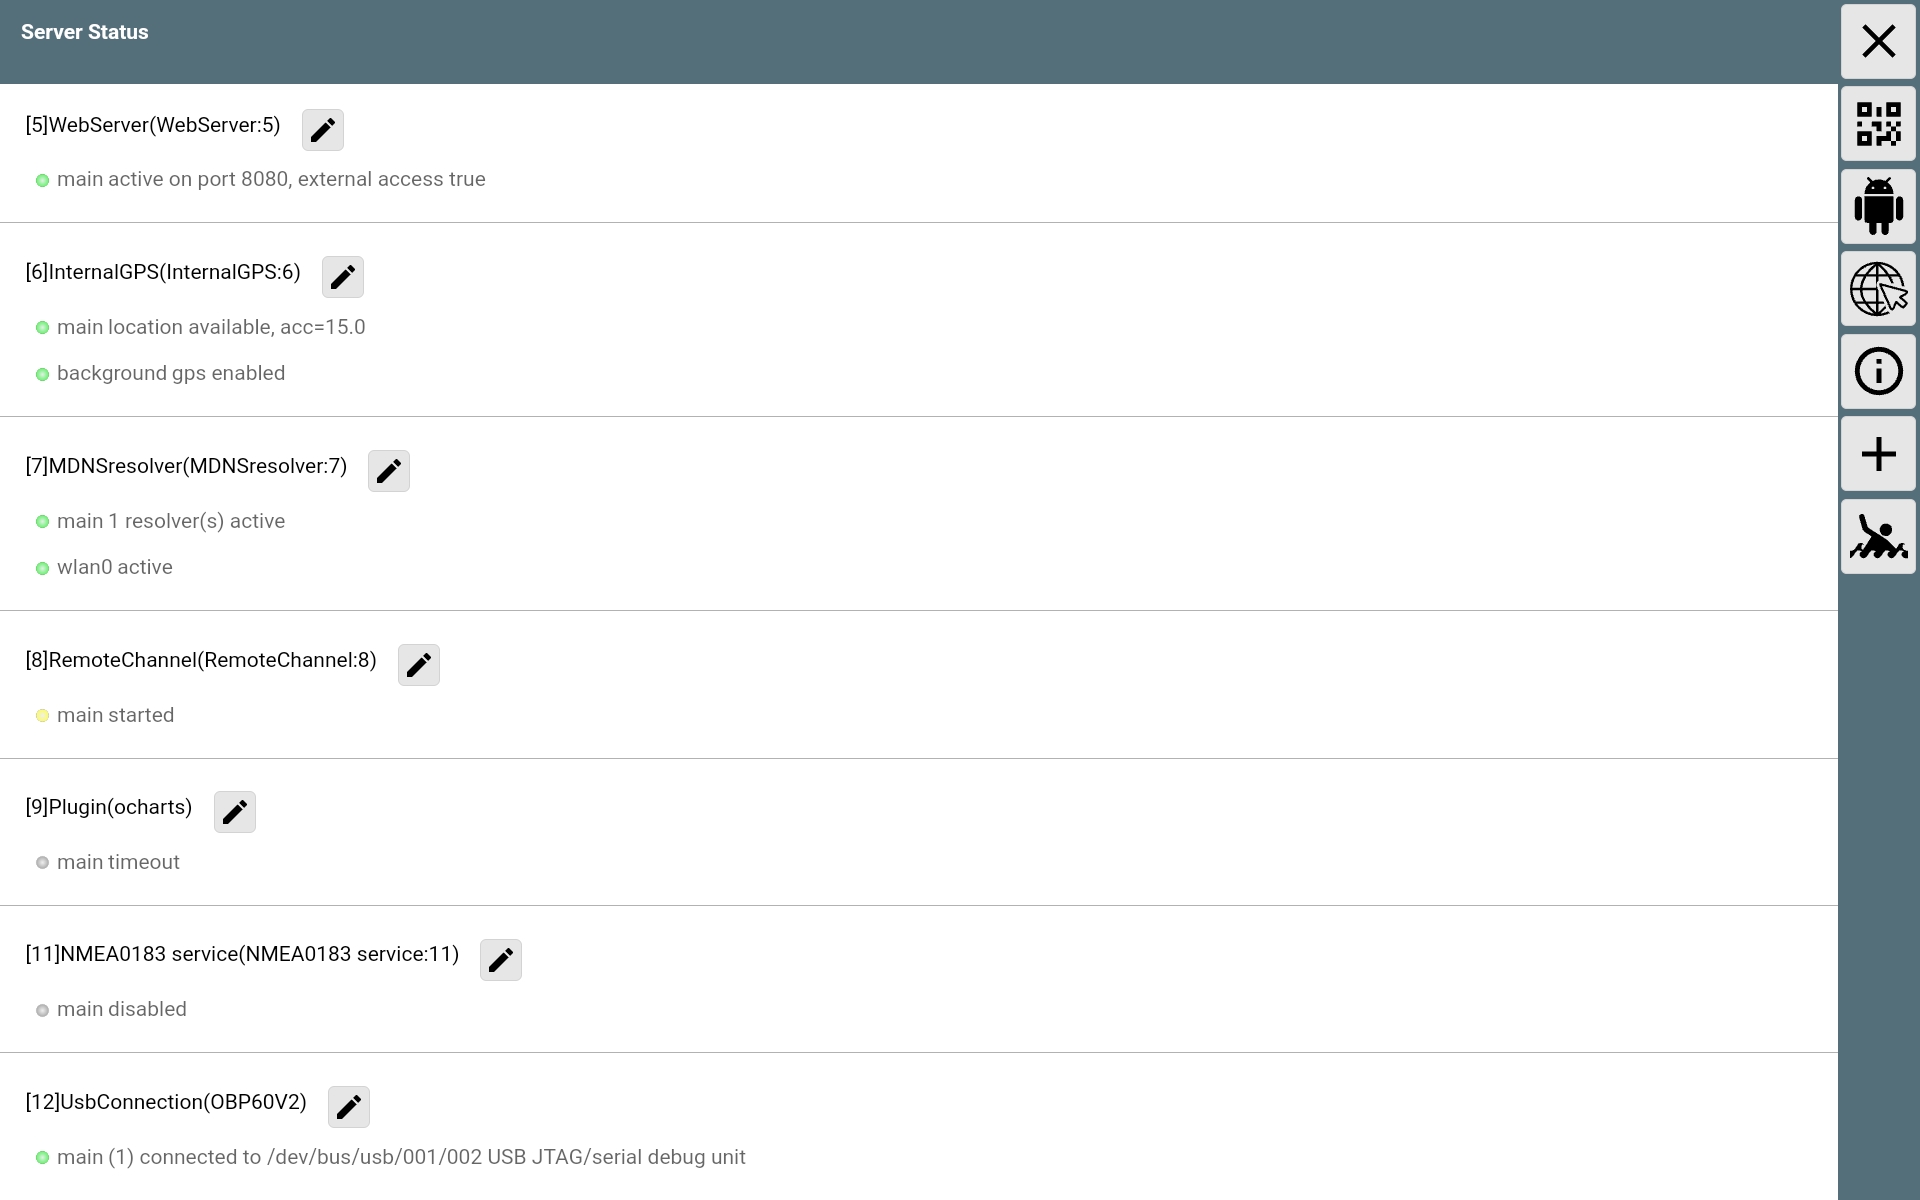
Abb.: Server-Status